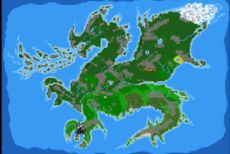
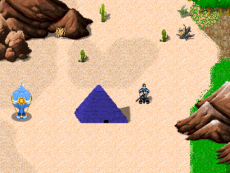
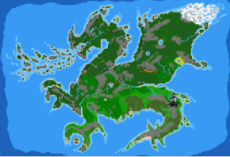
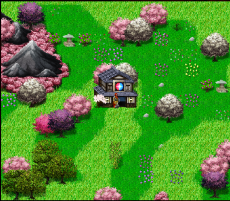
Difference between revisions of "Live quests"
m (Removing Vesimas Omizaran shop - checked and did not see it there.) |
(→Yin and Yang) |
||
| (77 intermediate revisions by 8 users not shown) | |||
| Line 1: | Line 1: | ||
| − | Live | + | Live Quests, or LQs for short, are game triggered events for which a boss monster appears in the world map or specific maps. |
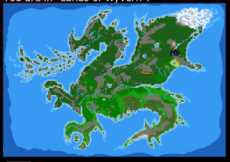
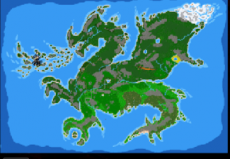
| − | + | '''Once per server instance between 30 minutes and 7 hours server time, one LQ will randomly be triggered and [[#Spawn Locations|the entrance will spawn on the world map at a fixed location]].''' | |
| − | + | '''If you would like to receive a notification when an LQ happens there is a [https://discordapp.com/invite/G2WQZEr discord channel] that notifies user's with the LQ role when an LQ happens.''' | |
| − | + | These events are usually considered high risk, high reward events. The boss monsters are always very tanky and considerably resistant to most damage types. They are also very dangerous by having the ability to hit multiple times per round, and typically have strong elemental spells and/or recoil damage. To make up for the risk, players will typically earn high level loot after slaying the boss. | |
| − | + | ||
| − | + | There are no player level restrictions on those type of events, but players will typically recommend being level 20+ to participate for both survivability and damage contribution reasons. Note that when loot is split at the end, it is based off of damage done, so lower level players will likely receive a much smaller reward than higher level players. | |
==Rewards== | ==Rewards== | ||
| − | Rewards for killing the raid boss are distributed to any participating player relative to damage dealt. Participants can expect to get anywhere from 1-2001 tokens based on their contributions. | + | * Rewards for killing the raid boss are distributed to any participating player relative to damage dealt. |
| + | * Participants can expect to get anywhere from 1-2001 tokens based on their contributions. | ||
| + | * Tears (a non-tradable character bound currency), are distributed based on damage done to the boss. | ||
| + | * '''Tears can be used to purchase items at [[:Category:Tear Item|Sesha's House of Tears]]'''. | ||
| + | |||
| + | {|class="wikitable" | ||
| + | ! Total damage ranges (%) | ||
| + | ! # Tears | ||
| + | |- | ||
| + | | [0, 2) | ||
| + | | 1 | ||
| + | |- | ||
| + | | [2, 4) | ||
| + | | 2 | ||
| + | |- | ||
| + | | [4, 9) | ||
| + | | 3 | ||
| + | |- | ||
| + | | [9, 15) | ||
| + | | 4 | ||
| + | |- | ||
| + | | [15, 22) | ||
| + | | 5 | ||
| + | |- | ||
| + | | [22, 31) | ||
| + | | 6 | ||
| + | |- | ||
| + | | [31, 40) | ||
| + | | 7 | ||
| + | |- | ||
| + | | [40, 50) | ||
| + | | 8 | ||
| + | |- | ||
| + | | [50, 100] | ||
| + | | 9 | ||
| + | |} | ||
| + | |||
| + | ==Spawn Locations== | ||
| + | |||
| + | The entrance will be placed on the world map once the final flavour message is shouted. | ||
| + | |||
| + | '''Note that after the entrance is placed on the world map, it will be available in locations when you apply a map.''' | ||
| + | |||
| + | ===Bauhdyre=== | ||
| + | |||
| + | '''Mount Ire''' is where [[#Bauhdyre_2|Bauhdyre]] can be found. | ||
| + | |||
| + | {| | ||
| + | |[[File:Bauhdyre location.png|thumb|upright|Mount Ire spawns east of the Caveman's guild.]] | ||
| + | |[[File:Bauhdyre location 2.png|thumb|upright|Apply the volcano to enter.]] | ||
| + | |} | ||
| + | |||
| + | ===Entremitis=== | ||
| + | |||
| + | '''Fields of Valor''' is where [[#Entremitis_2|Entremitis]] can be found. | ||
| + | |||
| + | {| | ||
| + | |[[File:Entremitis location.png|thumb|upright|The Fields of Valor spawn north east of Lirkka.]] | ||
| + | |[[File:Entremitis location 2.png|thumb|upright|Apply the red pyramid to enter.]] | ||
| + | |} | ||
| + | |||
| + | ===Mad Gander=== | ||
| + | '''Khaysti Farms''' is where the [[#Mad Gander_2|Mad Gander]] can be found. | ||
| + | |||
| + | {| | ||
| + | |[[File:Gander location.png|thumb|upright|Khaysti Farms is located south east east of Khaysti.]] | ||
| + | |[[File:Gander location 2.png|thumb|upright|Apply the farms to enter.]] | ||
| + | |} | ||
| + | |||
| + | ===Polyphemus=== | ||
| + | |||
| + | '''Desecrated Temple''' is where [[#Polyphemus_2|Polythemus]] is located. | ||
| + | |||
| + | {| | ||
| + | |[[File:Polythemus location.png|thumb|upright|The Desecrated Temple can be found north east of Havishfel.]] | ||
| + | |[[File:Polythemus location 2.png|thumb|upright|Apply the temple to enter]] | ||
| + | |} | ||
| + | |||
| + | ===Zyxxrytth=== | ||
| + | |||
| + | '''Zander's Starship''' is where [[#Zyxxrytth_2|Zyxxrytth]] can be found. | ||
| + | |||
| + | {| | ||
| + | |[[File:Zyxxrytth location.png|thumb|upright|Zander's Starship spawns south west of Minath or north of Rakshasa Harmya]] | ||
| + | |[[File:Zyxxrytth location 2.png|thumb|upright|Apply the purple pyramid to enter]] | ||
| + | |} | ||
| + | |||
| + | ===Yin and Yang=== | ||
| + | '''Temple of Yin and Yang''' is where [[#Yin_and_Yang_2|Yin and Yang]] can be found. | ||
| + | {| | ||
| + | |[[File:Worldmap yin yang.png|thumb|upright|Temple of Yin and Yang spawns east of Hentenko.]] | ||
| + | |[[File:Screenshot from 2023-08-16 21-04-08.png|thumb|upright|Apply the temple to enter]] | ||
| + | |} | ||
| + | |||
| + | ==Boss Information== | ||
| + | |||
| + | ===Bauhdyre=== | ||
| + | {| class="wikitable" | ||
| + | |- | ||
| + | | colspan="2" style="text-align: center;" | '''Bauhdyre''' | ||
| + | |- | ||
| + | | colspan="2" style="text-align: center;" | [[File:Bauhdyre.S.png]] [[File:Bauhdyre.W.png]] [[File:Bauhdyre.N.png]] [[File:Bauhdyre.E.png]] | ||
| + | |- | ||
| + | |Spells | ||
| + | |Thunderstorm, Magma Splash, Death Ray | ||
| + | |- | ||
| + | |Resistances | ||
| + | |Cold, Smash, Cut, Stab, Poison, Magic, Acid | ||
| + | |- | ||
| + | |Immunities | ||
| + | |Fire, Shock, Fear, Confusion, Paralysis, Slow, Charm, Petrification, Death | ||
| + | |} | ||
| + | |||
| + | '''[[Bauhdyre]] appears to blink periodically, it might be the same mechanic as [[Entremitis]] where it teleports to a random player''' | ||
| + | |||
| + | ====Melee Strategy==== | ||
| + | |||
| + | Use the highest WC [[Smash Damage|smash]], [[Cut Damage|cut]], or [[Stab Damage|stab]] damage weapon you have. | ||
| + | |||
| + | '''Aim to get [[Fire Resistance|fire immunity]] and as much [[Smash Resistance|smash resistance]] and AC as possible.''' | ||
| + | |||
| + | Since Bauhdyre has no debuff wave, you could cover shock resistance with an endurance potion. | ||
| + | |||
| + | Don't forget about [[Death Resistance]]: [[Amulet of Death Protection]] works nicely on this boss. | ||
| + | |||
| + | ====Mage Strategy==== | ||
| + | |||
| + | Stay out of magma splash' range, it does a large amount of fire and smash damage. | ||
| + | |||
| + | This is the most mage unfriendly boss, don't expect to do much damage with your spells. | ||
| + | |||
| + | Cold resistance seems somewhat reasonable, maybe use frostflame. | ||
| + | |||
| + | Sandstorm might work too, even if it has a low tick rate. | ||
| + | |||
| + | Poison might do better but will probably end up doing little if any damage since players overwrite each other's poison. | ||
| + | |||
| + | ====Archer Strategy==== | ||
| + | |||
| + | Stay out of magma splash' range, it does a large amount of fire and smash damage. | ||
| + | |||
| + | This probably takes you out of autofire range so you may have to fire manually. | ||
| + | |||
| + | If you have the right gear you might be able to endure. | ||
| + | |||
| + | '''Aim to get [[Fire Resistance|fire immunity]] and as much [[Smash Resistance|smash resistance]] and AC as possible.''' | ||
| + | |||
| + | ===Entremitis=== | ||
| + | |||
| + | {| class="wikitable" | ||
| + | |- | ||
| + | | colspan="2" style="text-align: center;" | '''Entremitis''' | ||
| + | |- | ||
| + | | colspan="2" style="text-align: center;" | [[File:Entremitis.S.png]] [[File:Entremitis.W.png]] [[File:Entremitis.N.png]] [[File:Entremitis.E.png]] | ||
| + | |- | ||
| + | |Spells | ||
| + | |Debuff wave, Wrath of the Gods, Earthquake, Death Ray | ||
| + | |- | ||
| + | |Resistances | ||
| + | |Fire, Cold, Smash, Cut, Stab, Poison | ||
| + | |- | ||
| + | |Immunities | ||
| + | |Shock, Fear, Confusion, Paralysis, Slow, Charm, Petrification, Death | ||
| + | |} | ||
| + | |||
| + | '''Note that [[Entremitis]] occasionally will teleport to a random player on the map''' | ||
| + | |||
| + | |||
| + | ====Getting to Entremitis==== | ||
| + | Aside from the kill-everything maps on the way in, there is a Worthiness puzzle to complete consisting of 5 statues on a map with enemies. Once you clear the enemies, one player will have to solve the puzzle. Multiple people solving it can interrupt the process, reports have suggested. | ||
| + | |||
| + | Each statue has a hidden value from 1-5. They must be interacted with in the correct order, however if you interact with a statue whose number is lower than the number before it, you will be deemed Unworthy and start over. | ||
| + | |||
| + | Ex: If you go 1-3-2, you will be unworthy. | ||
| + | |||
| + | While interacting with the statues, try to keep track of which ones make you unworthy following another, writing it down can help. | ||
| + | |||
| + | Once you discover which statue gets an unworthy response when following all others, you can confirm it's the first to click. | ||
| + | |||
| + | Ex: 2-4-1, 2-3-1, 2-5-1, 3-2-1 will all fail, so the statue being clicked last in each of these combinations is definitely statue #1 and should begin all subsequent patterns. | ||
| + | |||
| + | Once you are declared Worthy 5 times in a row, speak to the NPC near the gates in the north of the map to lower the gates and proceed. | ||
| + | |||
| + | ====Melee Strategy==== | ||
| + | |||
| + | Ideally use a weapon that does [[Magic Damage]]. | ||
| + | |||
| + | Otherwise simply use the highest WC [[Smash Damage|smash]], [[Cut Damage|cut]], or [[Stab Damage|stab]] damage weapon you have. | ||
| + | |||
| + | Since Entremitis has debuff wave, you will need to get all your resists from your equipment unless you plan on drinking A LOT of endurance potions. | ||
| + | |||
| + | Aim to get immunity to either [[Cold Resistance|cold]] or [[Shock Resistance|shock]]. | ||
| + | |||
| + | Don't forget about [[Death Resistance]]: [[Amulet of Death Protection]] works nicely on this boss. | ||
| + | |||
| + | =====Example human gear===== | ||
| + | |||
| + | This will give 50 dodge, shock immunity, 65% cold resistance, 50% melee resistance, and at least 70% death resistance. | ||
| + | |||
| + | If possible, use 2 or 3 [[Upgrading Weapon & Armor#Upgrading Overview|upgrade slots]] on other items to get cold resistance up to 90%. | ||
| + | |||
| + | {| class="wikitable" | ||
| + | ! Armor slot | ||
| + | ! Item | ||
| + | |- | ||
| + | |[[Helm]] | ||
| + | |Any +10 agility [[Helm]] | ||
| + | |- | ||
| + | |[[Mask]] | ||
| + | |Any | ||
| + | |- | ||
| + | |[[Amulet]] | ||
| + | |[[Amulet of Death Protection]] | ||
| + | |- | ||
| + | |[[Cloak]] | ||
| + | |[[Cloak of the Lion|Cloak of the Lion +10 agility]] | ||
| + | |- | ||
| + | |[[Chest]] | ||
| + | |[[Blue Dragon Scale Mail|Blue Dragon Scale Mail +10 agility]] | ||
| + | |- | ||
| + | |[[Waist]] | ||
| + | |[[Sokoban Wizard's Girdle]] | ||
| + | |- | ||
| + | |[[Shield]] | ||
| + | |[[Mithril Shield|Mithril Shield +10 agility]] | ||
| + | |- | ||
| + | |[[Ring]] 1 | ||
| + | |[[Ring of Melee Resistance]] | ||
| + | |- | ||
| + | |[[Ring]] 2 | ||
| + | |[[Ring of Enhanced Protection]] | ||
| + | |- | ||
| + | |[[Gloves]] | ||
| + | |Any +10 agility [[Gloves]] | ||
| + | |- | ||
| + | |[[Wrist]] | ||
| + | |[[Chilling Bracelet]] | ||
| + | |- | ||
| + | |[[Feet]] | ||
| + | | +10 [[Snow Boots]] 2 [[Upgrading Weapon & Armor#Upgrading Overview|slots]] used on [[Cold Resistance]] | ||
| + | |} | ||
| + | |||
| + | =====Example Rakshasa gear===== | ||
| + | |||
| + | |||
| + | This will give 40 dodge, shock immunity, 90% cold resistance, 45% melee resistance, and 90% death resistance. | ||
| + | |||
| + | If you want more dodge, you could swap the +10 ice sock/snow boots for +10 agility versions. | ||
| + | |||
| + | {| class="wikitable" | ||
| + | ! Armor slot | ||
| + | ! Item | ||
| + | |- | ||
| + | |[[Helm]] | ||
| + | |Any +10 agility [[Helm]] | ||
| + | |- | ||
| + | |[[Mask]] | ||
| + | |Any | ||
| + | |- | ||
| + | |[[Amulet]] | ||
| + | |[[Amulet of Death Protection]] | ||
| + | |- | ||
| + | |[[Cloak]] | ||
| + | |[[Cloak of the Lion|Cloak of the Lion +10 agility]] | ||
| + | |- | ||
| + | |[[Chest]] | ||
| + | |[[Blue Dragon Scale Mail|Blue Dragon Scale Mail +10 agility]] | ||
| + | |- | ||
| + | |[[Waist]] | ||
| + | |[[Sokoban Wizard's Girdle]] | ||
| + | |- | ||
| + | |[[Ring]] 1 | ||
| + | |[[Ring of Melee Resistance]] | ||
| + | |- | ||
| + | |[[Ring]] 2 | ||
| + | |[[Ring of Enhanced Protection]] | ||
| + | |- | ||
| + | |[[Gloves]] | ||
| + | | +10 [[Ice Sock]] 2 [[Upgrading Weapon & Armor#Upgrading Overview|slots]] used on [[Cold Resistance]] | ||
| + | |- | ||
| + | |[[Wrist]] | ||
| + | |[[Sokoban Wizard's Bracers]] | ||
| + | |- | ||
| + | |[[Feet]] | ||
| + | | +10 [[Snow Boots]] 2 [[Upgrading Weapon & Armor#Upgrading Overview|slots]] used on [[Cold Resistance]] | ||
| + | |} | ||
| + | |||
| + | ====Mage Strategy==== | ||
| + | |||
| + | Stay out of earthquake/debuff wave range. | ||
| + | |||
| + | The best damage spell for this boss is dragon breath, assuming you have high fire skill. | ||
| + | |||
| + | Frostflame is okay too but its damage doesn't scale as well as dragon breath. | ||
| + | |||
| + | Sandstorm will work but the hits per second is low so don't expect it to perform well. | ||
| + | |||
| + | Poison will probably end up doing little if any damage since players overwrite each other's poison. | ||
| + | |||
| + | ====Archer Strategy==== | ||
| + | |||
| + | Stay out of the earthquake/debuff wave range and turn on autofire. | ||
| + | |||
| + | ===Mad Gander=== | ||
| + | |||
| + | {| class="wikitable" | ||
| + | |- | ||
| + | | colspan="2" style="text-align: center;" | '''Mad Gander''' | ||
| + | |- | ||
| + | | colspan="2" style="text-align: center;" | [[File:Mad Gander.S.png]] [[File:Mad Gander.W.png]] [[File:Mad Gander.N.png]] [[File:Mad Gander.E.png]] | ||
| + | |- | ||
| + | |Spells | ||
| + | | Lightning shield, Thunderstorm, Stonewind | ||
| + | |- | ||
| + | |Resistances | ||
| + | |Fire, Shock, Cold, Smash, Cut, Stab, Acid, Poison | ||
| + | |- | ||
| + | |Immunities | ||
| + | | Fear, Confusion, Paralysis, Slow, Charm, Petrification, Death | ||
| + | |} | ||
| + | |||
| + | ====Getting to Mad Gander==== | ||
| + | |||
| + | {| | ||
| + | |[[File:Goose first map.png|thumbnail|First map has a bunch of houses.]] | ||
| + | |} | ||
| + | |||
| + | |||
| + | {| | ||
| + | |[[File:Goose example stair.png|thumbnail|'''One of them has a staircase down to a tunnel'''. Find it and follow the tunnel to a stairs up.]] | ||
| + | |[[File:Goose halfing map.png|thumbnail|'''Talk to the halfing to unblock the boulder in the previous map''']] | ||
| + | |} | ||
| + | |||
| + | * Lever puzzle | ||
| + | {| | ||
| + | |[[File:Lqgoose lever1.png|thumbnail|First gate's lever is the south east corner of the pen in the '''north east part of the map'''.]] | ||
| + | |[[File:Lqgoose lever2.png|thumbnail|Second gate's lever is in the '''center in the corner with the trees'''.]] | ||
| + | |} | ||
| + | |||
| + | {| | ||
| + | |[[File:Lqgoose lever3.png|thumbnail|Third gate's lever is the '''south east corner of the map'''.]] | ||
| + | |[[File:Lqgoose lever4.png|thumbnail|Fourth gate's lever is in '''south west corner of the map''']] | ||
| + | |} | ||
| + | |||
| + | {| | ||
| + | |[[File:Lqgoose lever5.png|thumbnail|Fifth gate's lever is the '''north west corner of the map'''.]] | ||
| + | |[[File:Lqgoose lever6.png|thumbnail|Sixth gate's lever is in the pen in the '''south west corner of the map''']] | ||
| + | |} | ||
| + | |||
| + | |||
| + | {| | ||
| + | |[[File:Lqgoose lever7.png|thumbnail|Seventh gate's lever is the '''north east corner of the map'''.]] | ||
| + | |[[File:Lqgoose lever8.png|thumbnail|Eighth gate's lever is '''center to the right of the trees''']] | ||
| + | |} | ||
| + | |||
| + | ====Strategy==== | ||
| + | |||
| + | =====Melee Strategy===== | ||
| + | |||
| + | Use the highest WC [[Smash Damage|smash]], [[Cut Damage|cut]], or [[Stab Damage|stab]] damage weapon you have. | ||
| + | |||
| + | =====Mage Strategy===== | ||
| + | |||
| + | Use dragon breath or thunderstorm. | ||
| + | |||
| + | Solo mage: | ||
| + | Use Archangel to tank for you and distract Gander. Poison from spells such as Poison Cloud and Poison Breath can stack to ticks up to 9999 poison damage assuming another player does not overwrite your poison. | ||
| + | |||
| + | =====Archer Strategy===== | ||
| + | |||
| + | Stand back and turn autofire on. | ||
| + | |||
| + | ===Polyphemus=== | ||
| + | |||
| + | {| class="wikitable" | ||
| + | |- | ||
| + | | colspan="2" style="text-align: center;" | '''Polyphemus''' | ||
| + | |- | ||
| + | | colspan="2" style="text-align: center;" | [[File:Polyphemus.S.png]] [[File:Polyphemus.W.png]] [[File:Polyphemus.N.png]] [[File:Polyphemus.E.png]] | ||
| + | |- | ||
| + | |Spells | ||
| + | |Earthquake, Slow, Death Ray, Fear | ||
| + | |- | ||
| + | |Resistances | ||
| + | |Fire, Shock, Cold, Smash, Cut, Stab, Poison | ||
| + | |- | ||
| + | |Immunities | ||
| + | | Fear, Confusion, Paralysis, Slow, Charm, Petrification, Death | ||
| + | |} | ||
| + | |||
| + | '''[[Polyphemus]] occasionally banishes all players on the map (teleports them to random locations)''' | ||
| + | |||
| + | '''WARNING! Polyphemus' earthquake is very strong''' | ||
| + | |||
| + | ====Getting to the Polyphemus==== | ||
| + | |||
| + | |||
| + | =====First map===== | ||
| + | |||
| + | Generally, need at least two people for this map. | ||
| + | |||
| + | It is possible to do it solo if you summon an arch shoggolich or a kalidemon. But you might need to use create earth wall to stop your summon from moving and really fast movement speed to make this work. | ||
| + | |||
| + | '''Pull all the levers to the right'''. This should lower gates 1, 2, 8, 9, and 10. | ||
| + | |||
| + | {| | ||
| + | |[[File:Poly gate 3.png|thumbnail|Gate 3. Stand of the button just south east of the trees by the east stairs.]] | ||
| + | |[[File:Poly gate 4.png|thumbnail|Gate 4. Stand on the button in the north west corner area, south east of the boulder.]] | ||
| + | |} | ||
| + | |||
| + | {| | ||
| + | |[[File:Poly gate 5b.png|thumbnail|Gate 5. Stand on the circled button in the southwest of the map.]] | ||
| + | |[[File:Poly gate 6.png|thumbnail|Gate 6. Stand on the button that is just west of the gates.]] | ||
| + | |} | ||
| + | |||
| + | {| | ||
| + | |[[File:Poly gate 7b.png|thumbnail|Gate 7. Stand on the circled button southwest of the map.]] | ||
| + | |} | ||
| + | |||
| + | =====Second map===== | ||
| + | |||
| + | This map is soloable. Damage a kalidemon until it runs from you and use it to push the buttons for you. | ||
| + | |||
| + | Order is west room, east room, north room, south room and finally a lever centre room. | ||
| + | |||
| + | {| | ||
| + | |[[File:Poly2 gate w.png|thumbnail|Stand on the button in the west room, this should lower the gates of the east room.]] | ||
| + | |[[File:Poly2 gate e.png|thumbnail|Stand on the button in the east room, this should lower the gates of the north room.]] | ||
| + | |} | ||
| + | |||
| + | {| | ||
| + | |[[File:Poly2 gate n.png|thumbnail|Stand on the button in the north room, this should lower the gates of the south room.]] | ||
| + | |[[File:Poly2 gate s.png|thumbnail|Stand on the button in the south room, this should lower the gates of the centre room.]] | ||
| + | |} | ||
| + | |||
| + | {| | ||
| + | |[[File:Poly2 gate centre.png|thumbnail|Pull the lever in the centre room to open the gates to the next map.]] | ||
| + | |} | ||
| + | |||
| + | =====Third map===== | ||
| + | |||
| + | Simple maze, kill everything and progress to the next map. | ||
| + | |||
| + | ====Strategy==== | ||
| + | |||
| + | =====Melee Strategy===== | ||
| + | |||
| + | Use the highest WC [[Smash Damage|smash]], [[Cut Damage|cut]], or [[Stab Damage|stab]] damage weapon you have. | ||
| + | |||
| + | Other elemental weapons with high WC might do well, since it seems Polyphemus has more melee resistance than elemental resistance. | ||
| − | + | '''Aim to get as much [[Smash Resistance|smash resistance]] and AC as possible.''' | |
| − | + | Don't forget about [[Death Resistance]]: [[Amulet of Death Protection]] works nicely on this boss. | |
| − | + | =====Mage Strategy===== | |
| − | + | ||
| + | Stay out of earthquake's range, it does a large amount of smash damage. | ||
| − | + | Use dragon breath or thunderstorm. | |
| − | + | Poison might do better but will probably end up doing little if any damage since players overwrite each other's poison. | |
| − | + | =====Archer Strategy===== | |
| − | + | Stay out of earthquake's range, it does a large amount of smash damage. | |
| − | + | ===Zyxxrytth=== | |
| − | + | {| class="wikitable" | |
| + | |- | ||
| + | | colspan="2" style="text-align: center;" | '''Zyxxrytth''' | ||
| + | |- | ||
| + | | colspan="2" style="text-align: center;" | [[File:Zyxxrytth.S.png]] [[File:Zyxxrytth.W.png]] [[File:Zyxxrytth.N.png]] [[File:Zyxxrytth.E.png]] | ||
| + | |- | ||
| + | |Spells | ||
| + | |Death ray, Demon Fire | ||
| + | |- | ||
| + | |Recoil | ||
| + | |Cold | ||
| + | |- | ||
| + | |Resistances | ||
| + | |Fire, Cold, Shock, Smash, Cut, Stab, Confusion, Paralysis | ||
| + | |- | ||
| + | |Immunities | ||
| + | |Acid, Magic, Fear, Slow, Charm, Petrification, Death, Poison | ||
| + | |} | ||
| − | + | '''Note that [[Zyxxrytth]] occasionally will spawn with artifact weapon that has 500 stab wc and slay demon, Raks will die very quickly if this is the case.''' | |
| − | + | '''You need [[Acid Resistance|acid resistance]], otherwise you will have a bad time.''' | |
| − | + | There are purple miasma tiles that do acid damage on most of the map. | |
| − | + | ====Getting to Zyxxrytth==== | |
| + | Clear the south, west, and east rooms and tap the terminals in each room. Go to the North room and tap the terminal to open the gate. Zyxxrytth can only be damaged on water tiles, so break the barrels in this room and drag him to these tiles. | ||
| − | + | BUG: Characters with nicknames may not be able to activate the terminals. | |
| − | + | ====Melee Strategy==== | |
| − | + | '''Ideally, use a weapon that does [[Cold Damage]].''' | |
| − | + | Otherwise simply use the highest WC [[Smash Damage|smash]], [[Cut Damage|cut]], or [[Stab Damage|stab]] damage weapon you have. | |
| − | + | '''Aim to get immunity to [[Acid Resistance|acid]] and [[Magic Resistance|magic resistance]] as high as possible.''' | |
| − | + | Don't forget about [[Death Resistance]]: [[Amulet of Death Protection]] works nicely on this boss. | |
| − | + | [[Void Dragon Scale Mail]] is very effective here. | |
| − | + | ====Mage Strategy==== | |
| − | + | You need [[Acid Resistance|acid resistance]], otherwise you will have a bad time. | |
| − | + | If you really can't get much acid resistance, hide in the small pockets of water to avoid the purple miasma. | |
| − | + | If you're a water mage rejoice, this boss' cold resistance is low. This is one of those rare situations where Frostflame shines. | |
| − | + | Otherwise, just use dragon breath or thunderstorm. | |
| − | + | ====Archer Strategy==== | |
| − | + | You need [[Acid Resistance|acid resistance]], otherwise you will have a bad time. | |
| + | If you really can't get much acid resistance, hide in the small pockets of water to avoid the purple miasma. | ||
| − | + | Use [[Frost Arrow]]s or elven arrows. | |
| − | + | ===Yin and Yang=== | |
| − | + | {| class="wikitable" | |
| + | |- | ||
| + | | colspan="2" style="text-align: center;" | '''Yin, the Manifestation of Chaos''' | ||
| + | |- | ||
| + | | colspan="2" style="text-align: center;" | [[File:Spirit wolf.S.png]] [[File:Spirit_wolf.W.png]] [[File:Spirit_wolf.N.png]] [[File:Spirit_wolf.E.png]] | ||
| + | |- | ||
| + | |Spells | ||
| + | |Thunderstorm, Slow | ||
| + | |- | ||
| + | |Resistances | ||
| + | |Cold, Poison, Fire, Shock, Magic | ||
| + | |- | ||
| + | |Immunities | ||
| + | |Smash, Death, Confusion, Paralysis, Cut, Acid, Stab, Fear, Petrify, Charm, Slow | ||
| + | |} | ||
| − | |||
| − | + | {| class="wikitable" | |
| + | |- | ||
| + | | colspan="2" style="text-align: center;" | '''Yang, the Manifestation of Order''' | ||
| + | |- | ||
| + | | colspan="2" style="text-align: center;" | [[File:Soul_wolf.S.png]] [[File:Soul_wolf.W.png]] [[File:Soul_wolf.N.png]] [[File:Soul_wolf.E.png]] | ||
| + | |- | ||
| + | |Spells | ||
| + | | | ||
| + | |- | ||
| + | |Resistances | ||
| + | | | ||
| + | |- | ||
| + | |Immunities | ||
| + | | | ||
| + | |} | ||
| − | + | ====Getting to Yin and Yang==== | |
| − | + | Pull all the levers on the left side (through the portal) to face the right, then pull all the levers on the right side to face the left. Repeat for each room | |
| + | until you reach the last room. You do not need to kill anything until you reach the map before the boss room, and then you must kill | ||
| + | everything to proceed. | ||
Latest revision as of 01:08, 8 February 2024
Live Quests, or LQs for short, are game triggered events for which a boss monster appears in the world map or specific maps.
Once per server instance between 30 minutes and 7 hours server time, one LQ will randomly be triggered and the entrance will spawn on the world map at a fixed location.
If you would like to receive a notification when an LQ happens there is a discord channel that notifies user's with the LQ role when an LQ happens.
These events are usually considered high risk, high reward events. The boss monsters are always very tanky and considerably resistant to most damage types. They are also very dangerous by having the ability to hit multiple times per round, and typically have strong elemental spells and/or recoil damage. To make up for the risk, players will typically earn high level loot after slaying the boss.
There are no player level restrictions on those type of events, but players will typically recommend being level 20+ to participate for both survivability and damage contribution reasons. Note that when loot is split at the end, it is based off of damage done, so lower level players will likely receive a much smaller reward than higher level players.
Contents
Rewards
- Rewards for killing the raid boss are distributed to any participating player relative to damage dealt.
- Participants can expect to get anywhere from 1-2001 tokens based on their contributions.
- Tears (a non-tradable character bound currency), are distributed based on damage done to the boss.
- Tears can be used to purchase items at Sesha's House of Tears.
| Total damage ranges (%) | # Tears |
|---|---|
| [0, 2) | 1 |
| [2, 4) | 2 |
| [4, 9) | 3 |
| [9, 15) | 4 |
| [15, 22) | 5 |
| [22, 31) | 6 |
| [31, 40) | 7 |
| [40, 50) | 8 |
| [50, 100] | 9 |
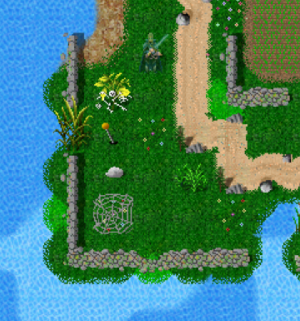
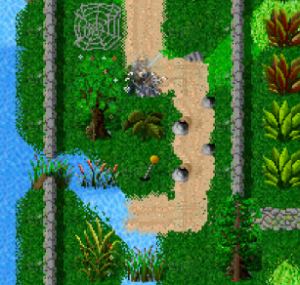
Spawn Locations
The entrance will be placed on the world map once the final flavour message is shouted.
Note that after the entrance is placed on the world map, it will be available in locations when you apply a map.
Bauhdyre
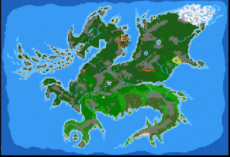
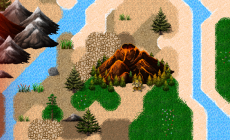
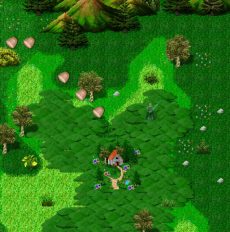
Mount Ire is where Bauhdyre can be found.
Entremitis
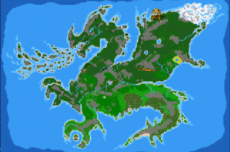
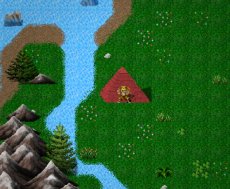
Fields of Valor is where Entremitis can be found.
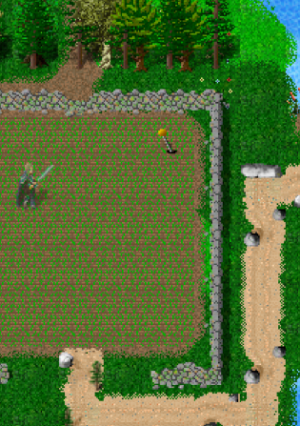
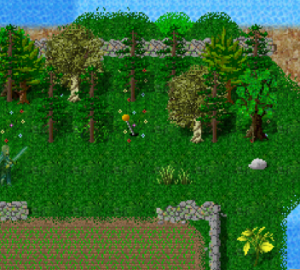
Mad Gander
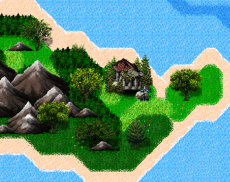
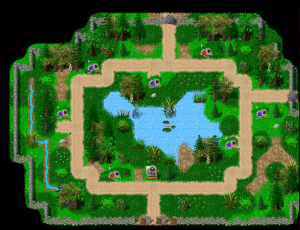
Khaysti Farms is where the Mad Gander can be found.
Polyphemus
Desecrated Temple is where Polythemus is located.
Zyxxrytth
Zander's Starship is where Zyxxrytth can be found.
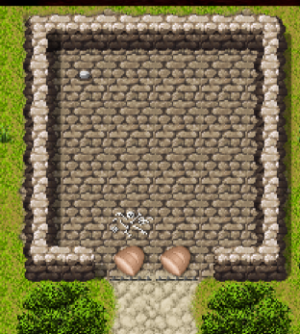
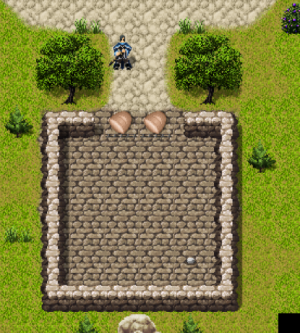
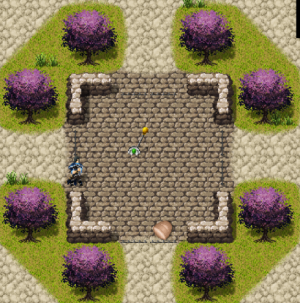
Yin and Yang
Temple of Yin and Yang is where Yin and Yang can be found.
Boss Information
Bauhdyre
| Bauhdyre | |
   
| |
| Spells | Thunderstorm, Magma Splash, Death Ray |
| Resistances | Cold, Smash, Cut, Stab, Poison, Magic, Acid |
| Immunities | Fire, Shock, Fear, Confusion, Paralysis, Slow, Charm, Petrification, Death |
Bauhdyre appears to blink periodically, it might be the same mechanic as Entremitis where it teleports to a random player
Melee Strategy
Use the highest WC smash, cut, or stab damage weapon you have.
Aim to get fire immunity and as much smash resistance and AC as possible.
Since Bauhdyre has no debuff wave, you could cover shock resistance with an endurance potion.
Don't forget about Death Resistance: Amulet of Death Protection works nicely on this boss.
Mage Strategy
Stay out of magma splash' range, it does a large amount of fire and smash damage.
This is the most mage unfriendly boss, don't expect to do much damage with your spells.
Cold resistance seems somewhat reasonable, maybe use frostflame.
Sandstorm might work too, even if it has a low tick rate.
Poison might do better but will probably end up doing little if any damage since players overwrite each other's poison.
Archer Strategy
Stay out of magma splash' range, it does a large amount of fire and smash damage.
This probably takes you out of autofire range so you may have to fire manually.
If you have the right gear you might be able to endure.
Aim to get fire immunity and as much smash resistance and AC as possible.
Entremitis
Note that Entremitis occasionally will teleport to a random player on the map
Getting to Entremitis
Aside from the kill-everything maps on the way in, there is a Worthiness puzzle to complete consisting of 5 statues on a map with enemies. Once you clear the enemies, one player will have to solve the puzzle. Multiple people solving it can interrupt the process, reports have suggested.
Each statue has a hidden value from 1-5. They must be interacted with in the correct order, however if you interact with a statue whose number is lower than the number before it, you will be deemed Unworthy and start over.
Ex: If you go 1-3-2, you will be unworthy.
While interacting with the statues, try to keep track of which ones make you unworthy following another, writing it down can help.
Once you discover which statue gets an unworthy response when following all others, you can confirm it's the first to click.
Ex: 2-4-1, 2-3-1, 2-5-1, 3-2-1 will all fail, so the statue being clicked last in each of these combinations is definitely statue #1 and should begin all subsequent patterns.
Once you are declared Worthy 5 times in a row, speak to the NPC near the gates in the north of the map to lower the gates and proceed.
Melee Strategy
Ideally use a weapon that does Magic Damage.
Otherwise simply use the highest WC smash, cut, or stab damage weapon you have.
Since Entremitis has debuff wave, you will need to get all your resists from your equipment unless you plan on drinking A LOT of endurance potions.
Aim to get immunity to either cold or shock.
Don't forget about Death Resistance: Amulet of Death Protection works nicely on this boss.
Example human gear
This will give 50 dodge, shock immunity, 65% cold resistance, 50% melee resistance, and at least 70% death resistance.
If possible, use 2 or 3 upgrade slots on other items to get cold resistance up to 90%.
| Armor slot | Item |
|---|---|
| Helm | Any +10 agility Helm |
| Mask | Any |
| Amulet | Amulet of Death Protection |
| Cloak | Cloak of the Lion +10 agility |
| Chest | Blue Dragon Scale Mail +10 agility |
| Waist | Sokoban Wizard's Girdle |
| Shield | Mithril Shield +10 agility |
| Ring 1 | Ring of Melee Resistance |
| Ring 2 | Ring of Enhanced Protection |
| Gloves | Any +10 agility Gloves |
| Wrist | Chilling Bracelet |
| Feet | +10 Snow Boots 2 slots used on Cold Resistance |
Example Rakshasa gear
This will give 40 dodge, shock immunity, 90% cold resistance, 45% melee resistance, and 90% death resistance.
If you want more dodge, you could swap the +10 ice sock/snow boots for +10 agility versions.
| Armor slot | Item |
|---|---|
| Helm | Any +10 agility Helm |
| Mask | Any |
| Amulet | Amulet of Death Protection |
| Cloak | Cloak of the Lion +10 agility |
| Chest | Blue Dragon Scale Mail +10 agility |
| Waist | Sokoban Wizard's Girdle |
| Ring 1 | Ring of Melee Resistance |
| Ring 2 | Ring of Enhanced Protection |
| Gloves | +10 Ice Sock 2 slots used on Cold Resistance |
| Wrist | Sokoban Wizard's Bracers |
| Feet | +10 Snow Boots 2 slots used on Cold Resistance |
Mage Strategy
Stay out of earthquake/debuff wave range.
The best damage spell for this boss is dragon breath, assuming you have high fire skill.
Frostflame is okay too but its damage doesn't scale as well as dragon breath.
Sandstorm will work but the hits per second is low so don't expect it to perform well.
Poison will probably end up doing little if any damage since players overwrite each other's poison.
Archer Strategy
Stay out of the earthquake/debuff wave range and turn on autofire.
Mad Gander
| Mad Gander | |
   
| |
| Spells | Lightning shield, Thunderstorm, Stonewind |
| Resistances | Fire, Shock, Cold, Smash, Cut, Stab, Acid, Poison |
| Immunities | Fear, Confusion, Paralysis, Slow, Charm, Petrification, Death |
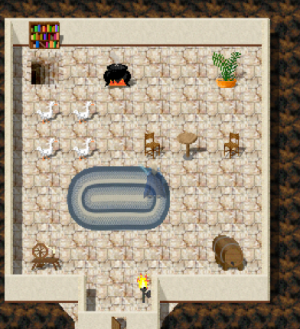
Getting to Mad Gander
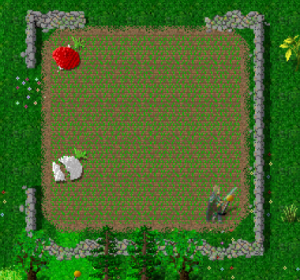
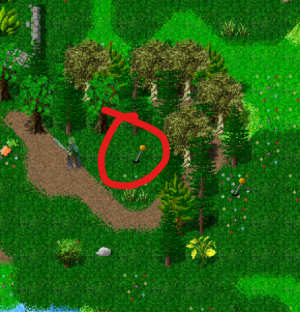
- Lever puzzle
Strategy
Melee Strategy
Use the highest WC smash, cut, or stab damage weapon you have.
Mage Strategy
Use dragon breath or thunderstorm.
Solo mage: Use Archangel to tank for you and distract Gander. Poison from spells such as Poison Cloud and Poison Breath can stack to ticks up to 9999 poison damage assuming another player does not overwrite your poison.
Archer Strategy
Stand back and turn autofire on.
Polyphemus
| Polyphemus | |
   
| |
| Spells | Earthquake, Slow, Death Ray, Fear |
| Resistances | Fire, Shock, Cold, Smash, Cut, Stab, Poison |
| Immunities | Fear, Confusion, Paralysis, Slow, Charm, Petrification, Death |
Polyphemus occasionally banishes all players on the map (teleports them to random locations)
WARNING! Polyphemus' earthquake is very strong
Getting to the Polyphemus
First map
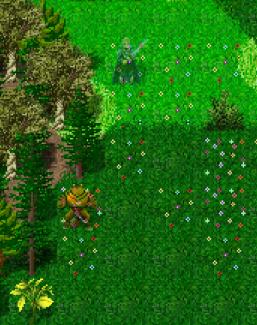
Generally, need at least two people for this map.
It is possible to do it solo if you summon an arch shoggolich or a kalidemon. But you might need to use create earth wall to stop your summon from moving and really fast movement speed to make this work.
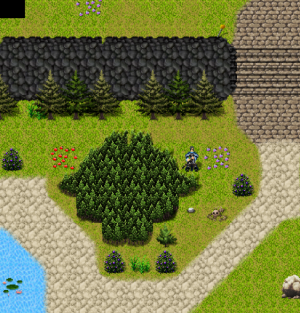
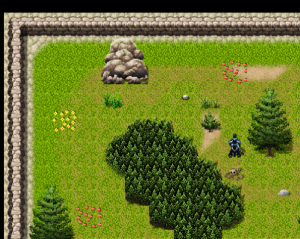
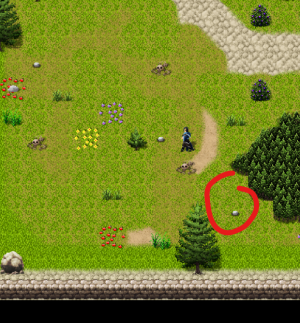
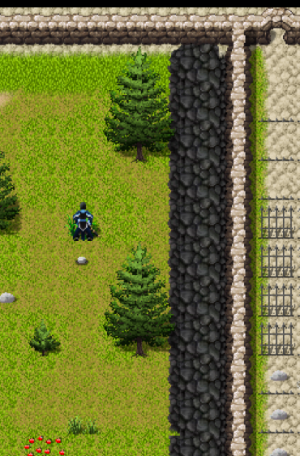
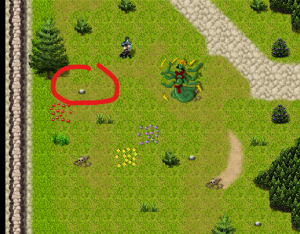
Pull all the levers to the right. This should lower gates 1, 2, 8, 9, and 10.
Second map
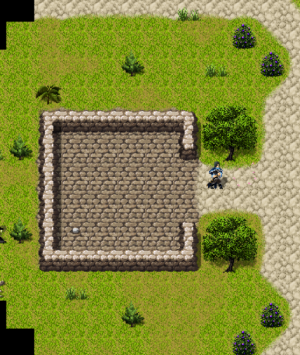
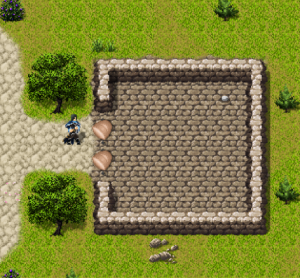
This map is soloable. Damage a kalidemon until it runs from you and use it to push the buttons for you.
Order is west room, east room, north room, south room and finally a lever centre room.
Third map
Simple maze, kill everything and progress to the next map.
Strategy
Melee Strategy
Use the highest WC smash, cut, or stab damage weapon you have.
Other elemental weapons with high WC might do well, since it seems Polyphemus has more melee resistance than elemental resistance.
Aim to get as much smash resistance and AC as possible.
Don't forget about Death Resistance: Amulet of Death Protection works nicely on this boss.
Mage Strategy
Stay out of earthquake's range, it does a large amount of smash damage.
Use dragon breath or thunderstorm.
Poison might do better but will probably end up doing little if any damage since players overwrite each other's poison.
Archer Strategy
Stay out of earthquake's range, it does a large amount of smash damage.
Zyxxrytth
| Zyxxrytth | |
   
| |
| Spells | Death ray, Demon Fire |
| Recoil | Cold |
| Resistances | Fire, Cold, Shock, Smash, Cut, Stab, Confusion, Paralysis |
| Immunities | Acid, Magic, Fear, Slow, Charm, Petrification, Death, Poison |
Note that Zyxxrytth occasionally will spawn with artifact weapon that has 500 stab wc and slay demon, Raks will die very quickly if this is the case.
You need acid resistance, otherwise you will have a bad time.
There are purple miasma tiles that do acid damage on most of the map.
Getting to Zyxxrytth
Clear the south, west, and east rooms and tap the terminals in each room. Go to the North room and tap the terminal to open the gate. Zyxxrytth can only be damaged on water tiles, so break the barrels in this room and drag him to these tiles.
BUG: Characters with nicknames may not be able to activate the terminals.
Melee Strategy
Ideally, use a weapon that does Cold Damage.
Otherwise simply use the highest WC smash, cut, or stab damage weapon you have.
Aim to get immunity to acid and magic resistance as high as possible.
Don't forget about Death Resistance: Amulet of Death Protection works nicely on this boss.
Void Dragon Scale Mail is very effective here.
Mage Strategy
You need acid resistance, otherwise you will have a bad time.
If you really can't get much acid resistance, hide in the small pockets of water to avoid the purple miasma.
If you're a water mage rejoice, this boss' cold resistance is low. This is one of those rare situations where Frostflame shines.
Otherwise, just use dragon breath or thunderstorm.
Archer Strategy
You need acid resistance, otherwise you will have a bad time.
If you really can't get much acid resistance, hide in the small pockets of water to avoid the purple miasma.
Use Frost Arrows or elven arrows.
Yin and Yang
| Yin, the Manifestation of Chaos | |
   
| |
| Spells | Thunderstorm, Slow |
| Resistances | Cold, Poison, Fire, Shock, Magic |
| Immunities | Smash, Death, Confusion, Paralysis, Cut, Acid, Stab, Fear, Petrify, Charm, Slow |
| Yang, the Manifestation of Order | |
   
| |
| Spells | |
| Resistances | |
| Immunities | |
Getting to Yin and Yang
Pull all the levers on the left side (through the portal) to face the right, then pull all the levers on the right side to face the left. Repeat for each room until you reach the last room. You do not need to kill anything until you reach the map before the boss room, and then you must kill everything to proceed.
