|
|
| Line 40: |
Line 40: |
| | | | |
| | ===Graverobber=== | | ===Graverobber=== |
| | + | |
| | + | [[File:Sock normal.png]][[Graverobber's Tail Sock]] |
| | + | |
| | + | [[File:Mummy wrapping.png]][[Graverobber's Wraps]] |
| | | | |
| | From the start. | | From the start. |
Revision as of 03:32, 4 February 2024
Location
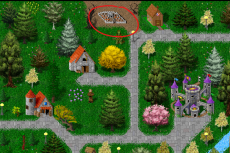 Start in Fae Wyston. Apply the graveyard in the north west. |
|
|
Walkthrough
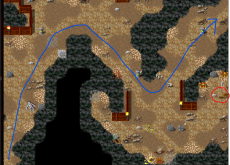
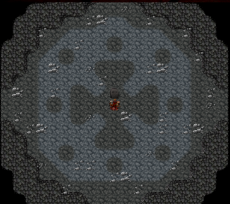
Minimap
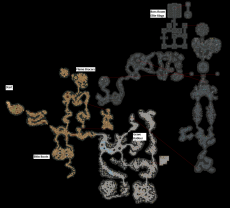 Minimap of the entire dungeon |
Flame Bracers
 Flame bracers are armor for wrists that give +1 fire skill
From the start.
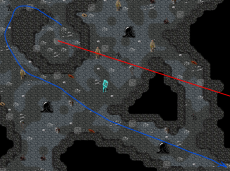
Move SE 2 maps, then NE then N then NE.
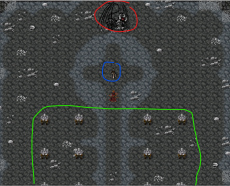
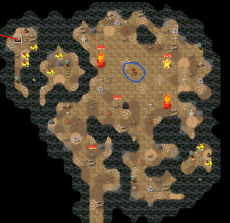 Kill Filian, Wielder of fire (circled in blue). Drop is not guaranteed. You may need to kill him multiple times. |
Ettin Boots
 Ettin Boots are armor for feet that give +1 strength skill
From the start.
Move SE 2 maps, then S.
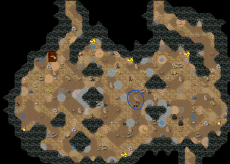 Kill Engrind, bringer of undeath (circled in blue). |
Graverobber
 Graverobber's Tail Sock
 Graverobber's Wraps
From the start.
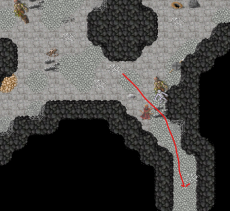
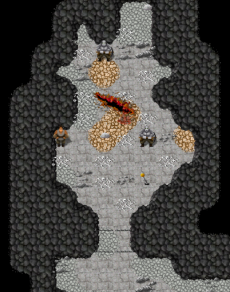
Move SE 2 maps, then NE then N.
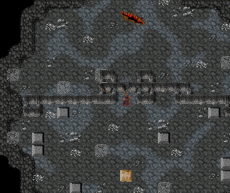
 Let's refer to the room as the fork. |
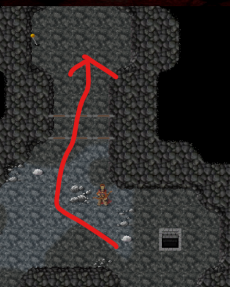
- Follow the blue path which will take you to a path full of spiders.
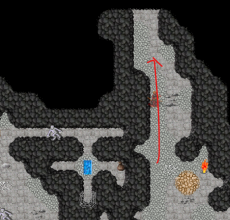
- Kill the spiders and head south.
- Pull the lever.
- Backtrack to the fork map
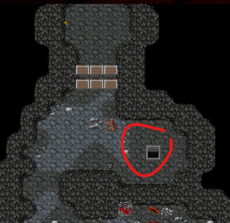
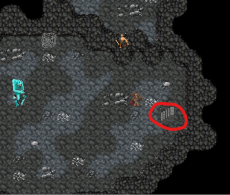
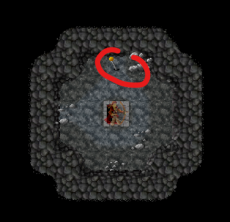
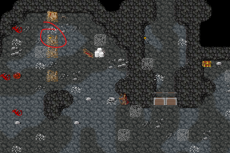
- Apply the hole circled in red.
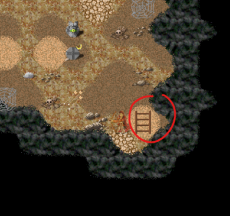 Head south and apply the ladder circled in red. |
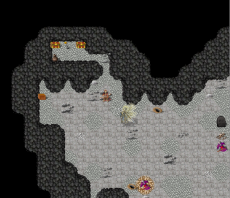
 Pull the lever and head to the map to the east |
|
|
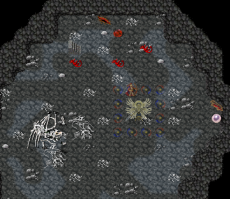
 In the north side of the map, the grave robber will randomly spawn. |
Elite Rings
From the start.
Move SE 2 maps, then NE then N.
Let's refer to the room as the fork. |
- Follow the blue path which will take you to a path full of spiders.
- Kill the spiders and head south.
- Pull the lever.
- Backtrack to the fork map
- Apply the hole circled in red.
Head south and apply the ladder circled in red. |
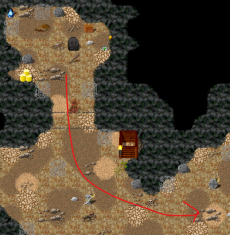
Pull the lever and head to the map to the east. Let's refer to this map as the central room |
 Head to the map south east then east through a small corridor. |
 Head northeast then north |
 Kill the monsters and pull the lever in the northwest of the map. Go south then west then north to return to the central room |
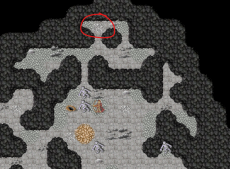
 Head to the map northeast of the central room |
 Head to north and apply the crevice |
|
|
 Head down the north west hall. |
 In the north side of the map there are some gates and some stairs down. Let's refer to this as the gate room. Go down the stairs circled in red |
 Follow the blue path and move to the south east |
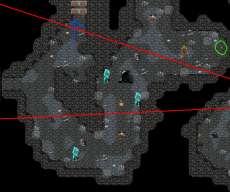 Pull the lever circled in green. Follow the blue path north. |
 Pull the lever circled in green. Follow the blue path to the south east. |
 Kill monsters and go up the stairs |
 Pull the lever. Head down the stairs and head west. You are now at the stairs down from the gate room. Head to the south west corner. |
 Work your way forward until you kill an AD. Go up the stairs and pull the lever. Go down the stairs, head north east and go up the stairs to the gate room |
 From the gate room. Head north past the lowered gates. |
 You are now in a maze map. Follow the directions below. |
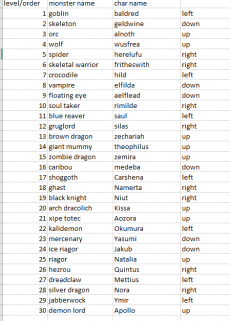 Directions to get to the next map. These are based off the monster names on the graves scattered around the area. Ordered by threat level. |
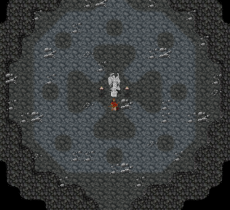 When you reach the map with a statue, you have escaped the maze. Head north. |
 Pull the lever in the north west hidden under the earth walls. |
 Pull the lever in the north east hidden under the earth walls and then head north. |
 At the door type: say You are quite perceptive aren't you Note that this is case sensitive. If you have a chat filter nofilter You are quite perceptive aren't you |
 This is the boss room. The dwarves circled in green will move once the boss fight starts. Talk to Tryssa (circled in blue). After the dialogue say yes The boss fight will begin. After you kill the dwarves, the shogdestroyer (circled in red) will become active. Kill the shogdestroyer and loot a random elite ring from its corpse. |


